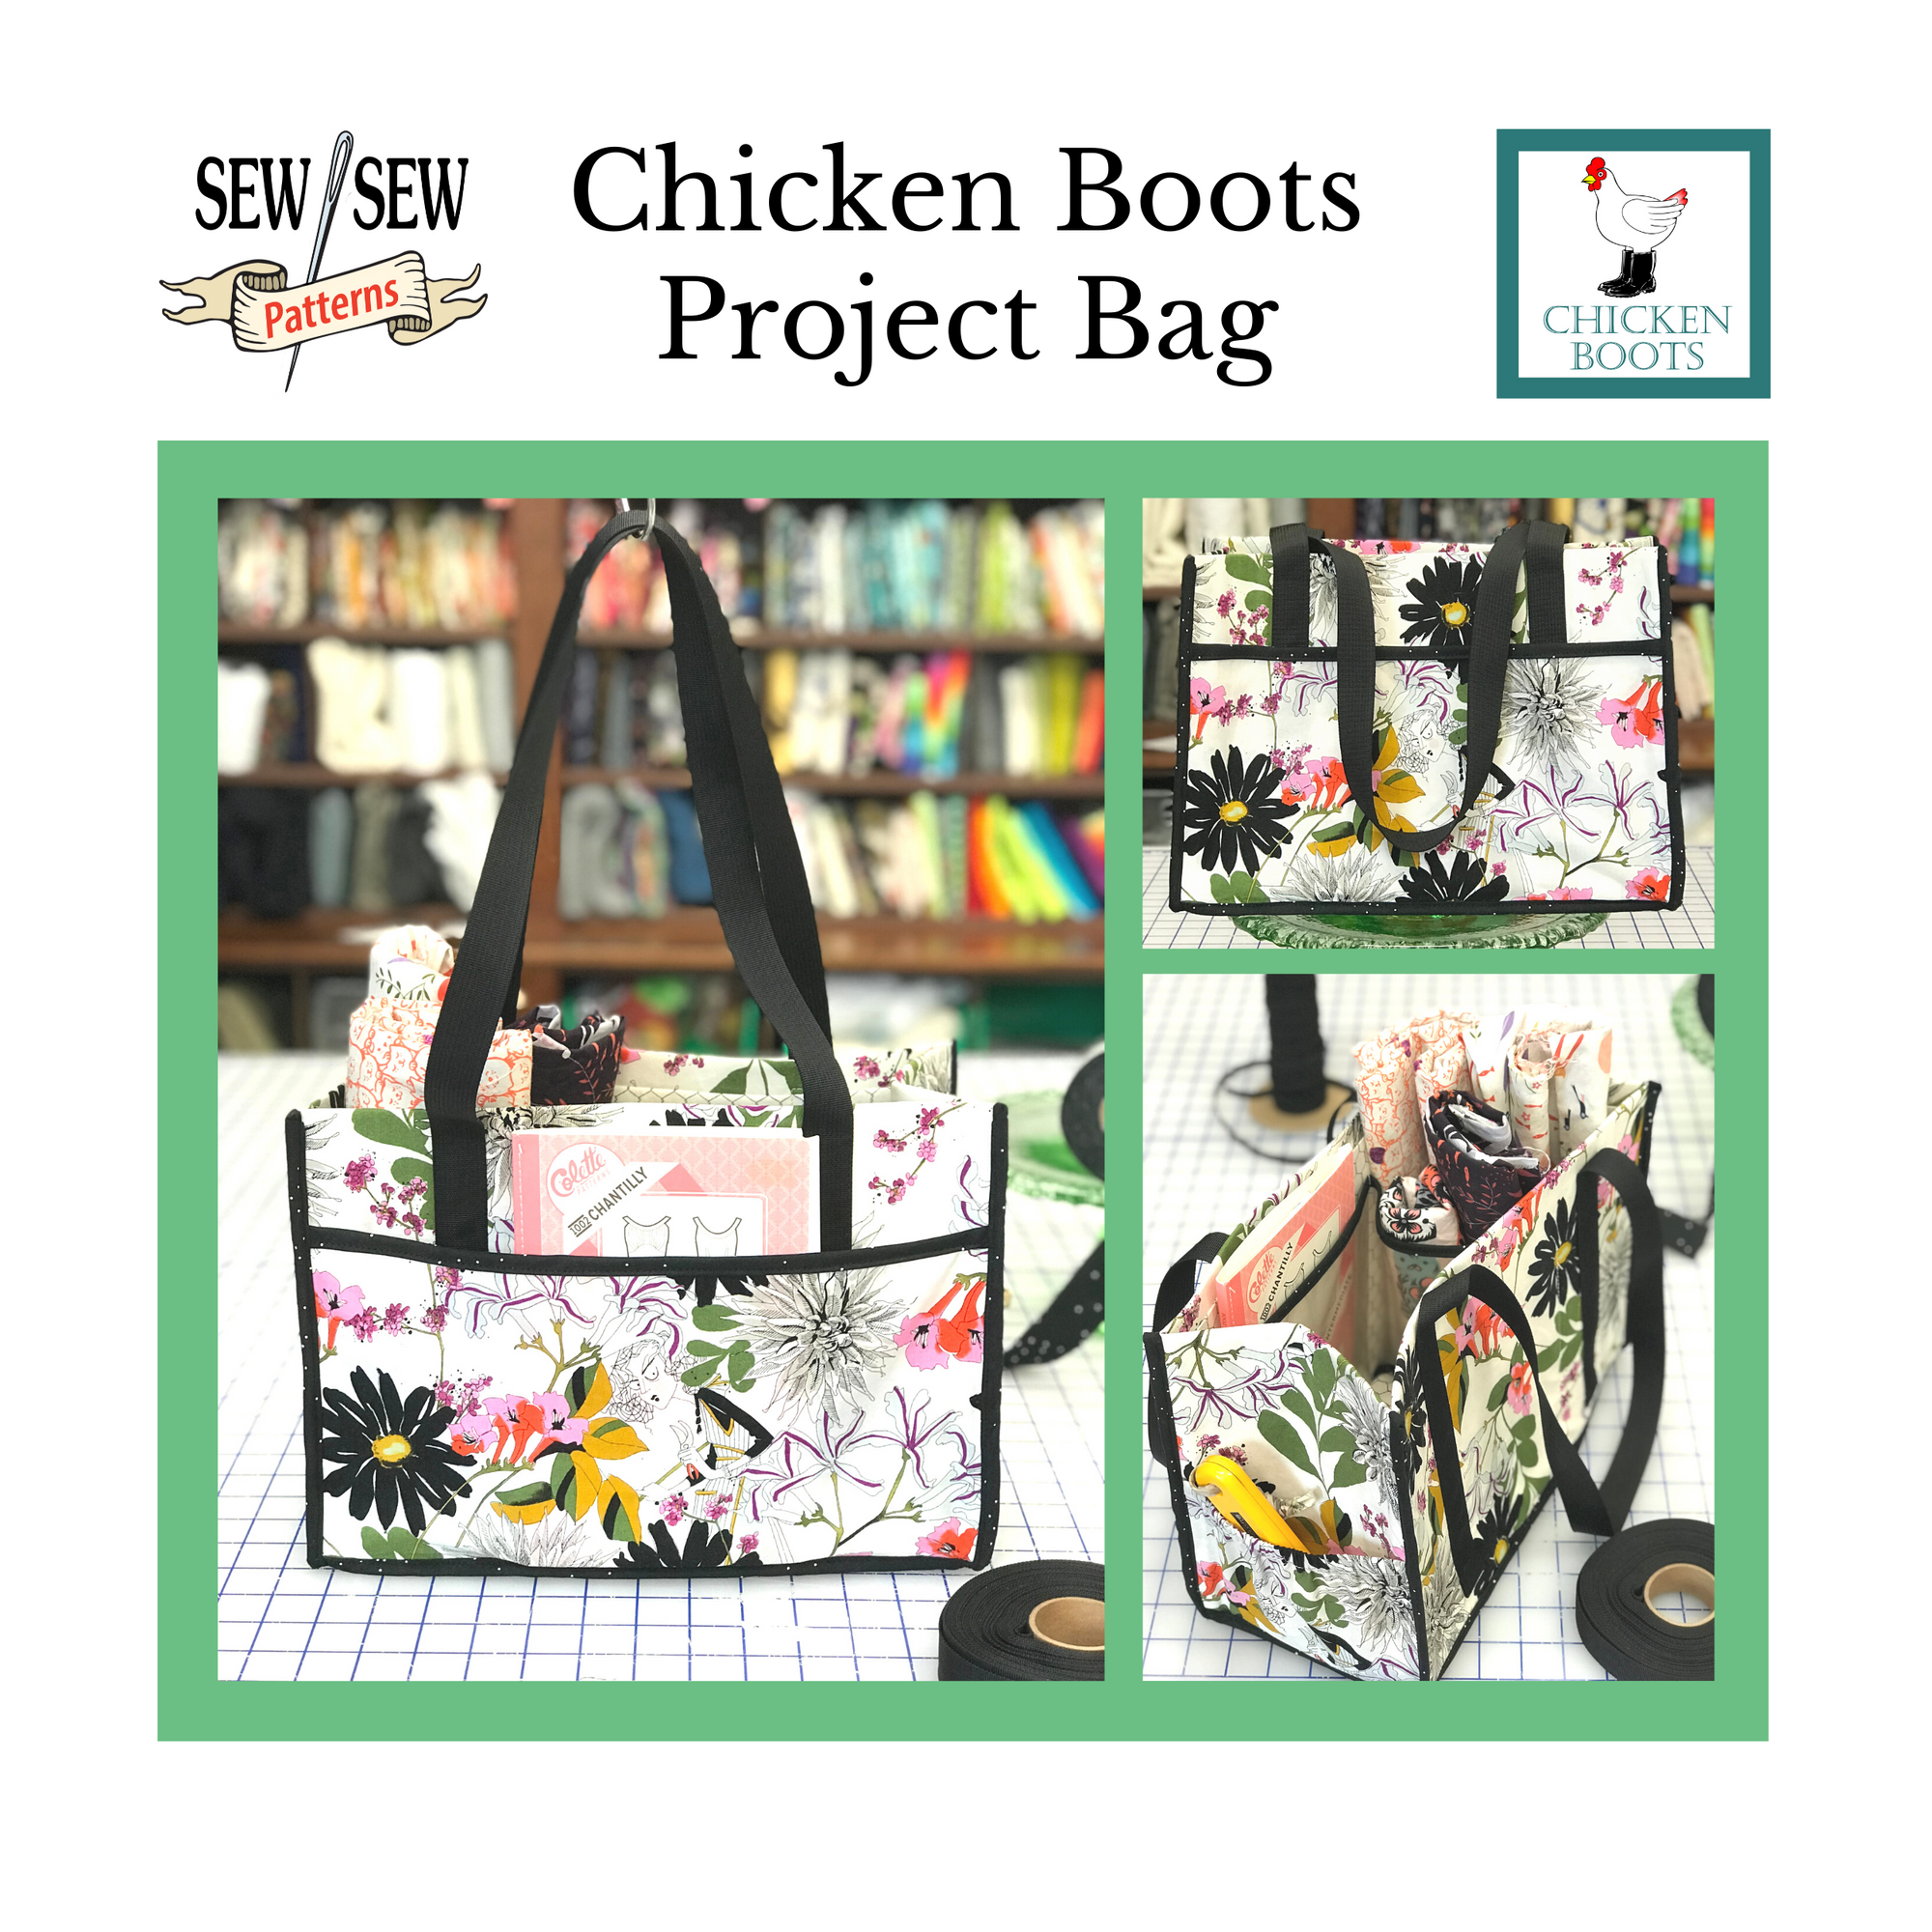
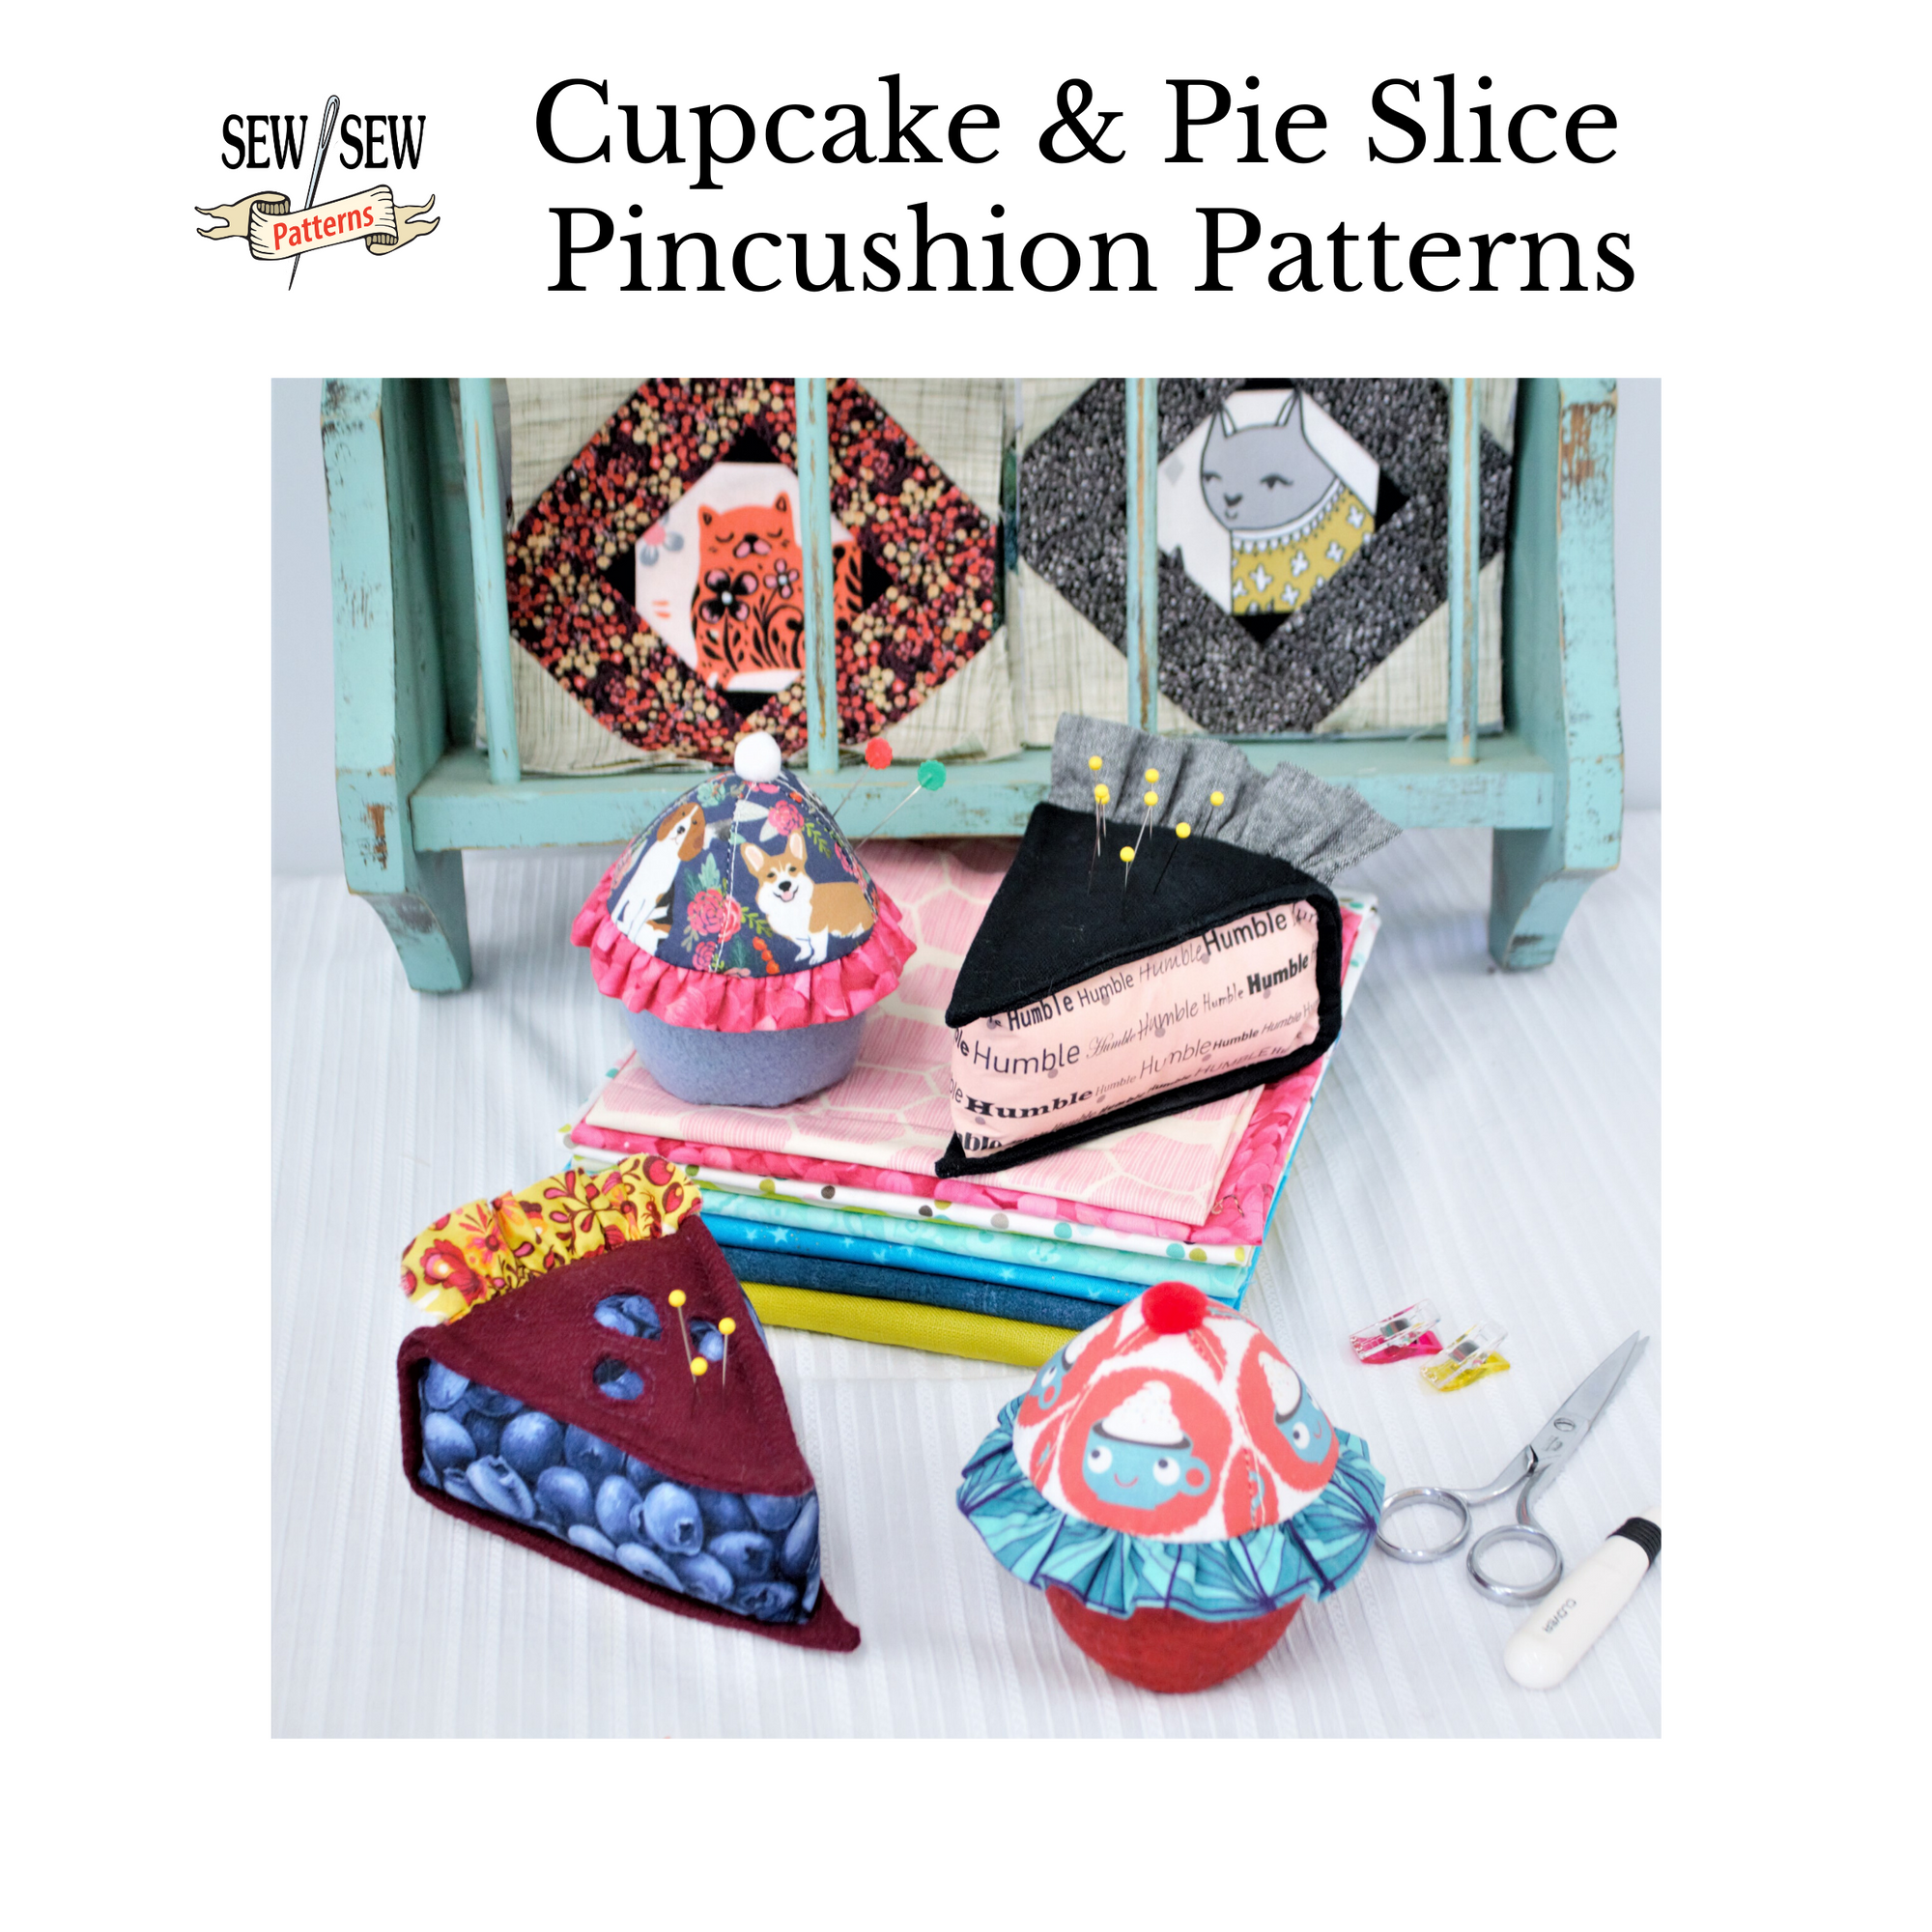
Your Cart is Empty


Free
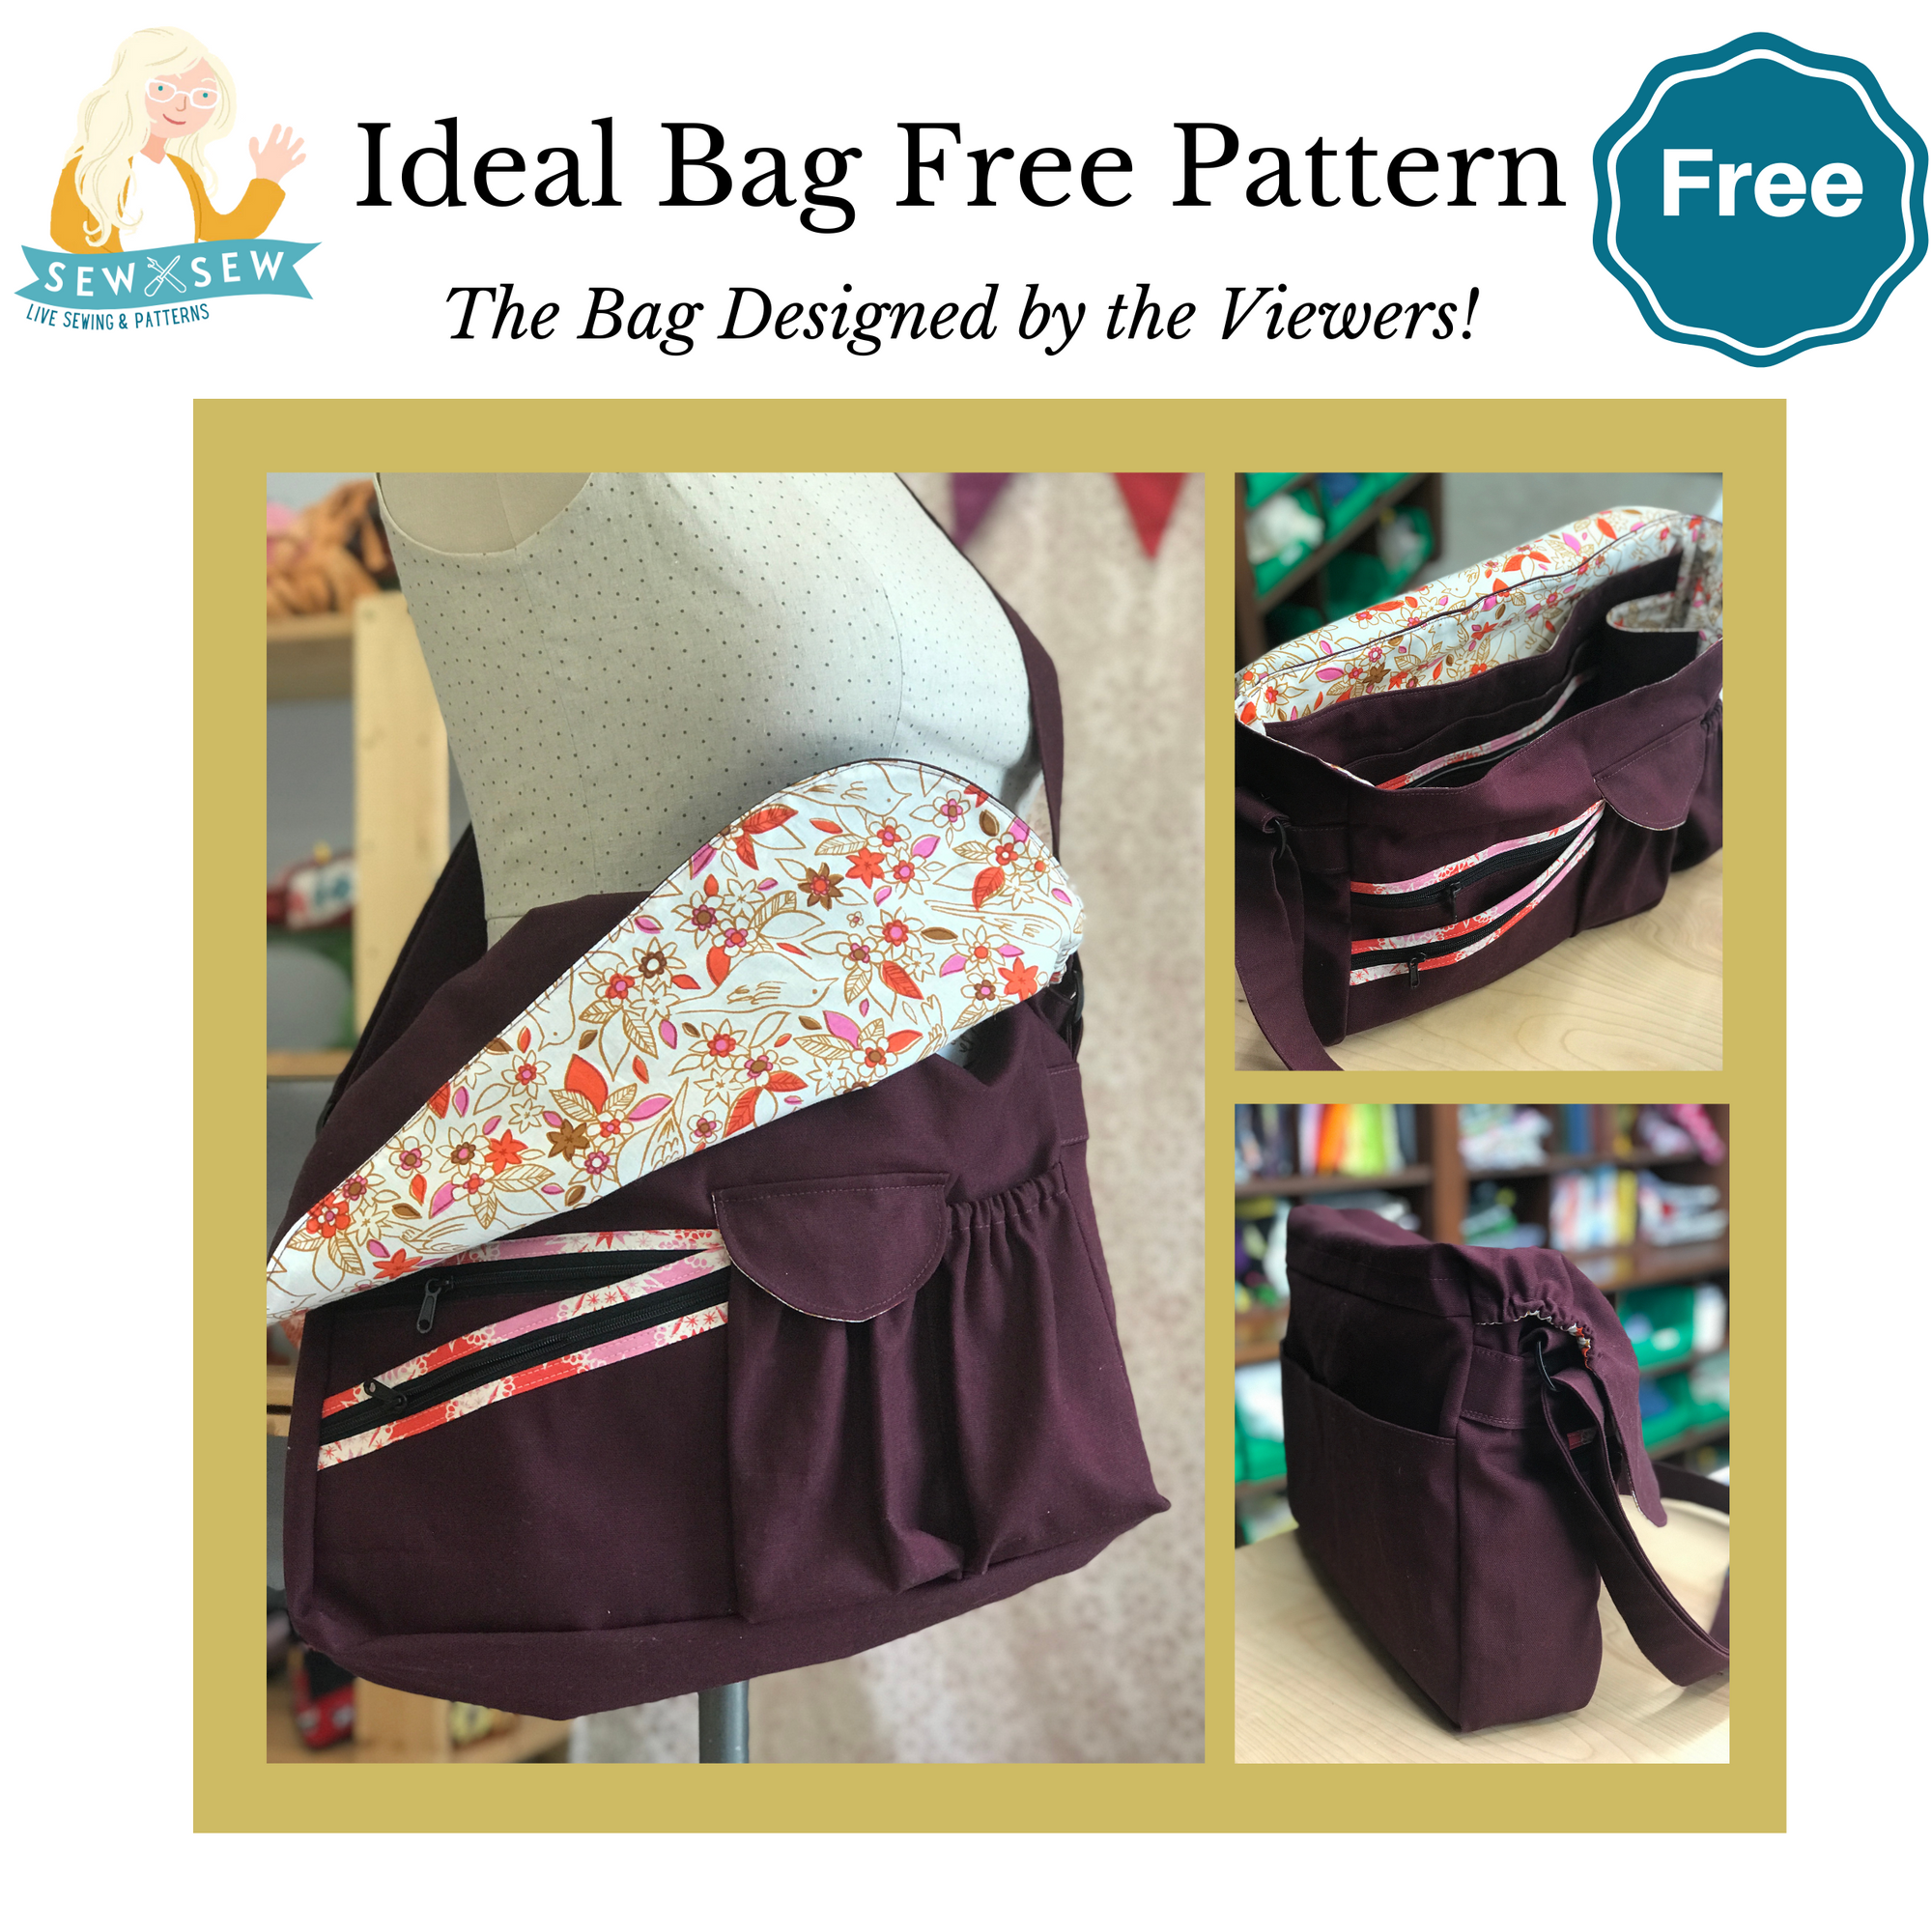
The Sew Sew Chat Designed the Ideal Bag!
Below are loads of details and links to the videos designing the bag as well as the full length videos for Sewing and Cutting. Please feel free to download the printable pattern! It is Free and contains all the pattern pieces and details below. Sewing Instructions are Video only and they're detailed with options and ideas.
Purchase Notes:
The How To Videos are linked below and you can save them on YouTube.
Sewing Level:Intermediate or Adventurous Advanced Beginner
Fabric: Choose fabrics that are somewhat sturdy with good body for the Outer Fabric such as canvas, twills, denim, and waxed canvas. For the lining, you can use a variety of weights but try to select something quilting cotton weight. Remember you'll be shoving stuff in your bag and it needs to withstand edges and corners of objects. You can reinforce many fabrics to get the weight you need. See below for fabric amounts and tips for adding stiffener, padding and/or interfacing.
Sizes:
Regular Sized: 14" wide x 9.25" tall x 3.75" deep (front to back) Cream bag in photos
Full Sized: 16.5" wide x 11" tall x 4" deep (front to back) Wine colored bag in photos
Description: The viewers did an amazing job drafting their 'Ideal Bag'. It is full-featured and designed so you can pick and choose what you want in your bag. You can design yours to suit your needs but here's an overview of what the Viewers requested and their reasoning:
Sewing
While this bag may look a little intimidating to sew, it was drafted to make sewing it the simplest and straight-forward. You will have a bag you are definitely proud you made! If you want to build your sewing and bag making skills, this is a great project. The video walks you through each section in chapters. It will be easy to sew this and walk away from it if you need a break! Just organize it from the beginning and follow along. You got this!
Materials:
Fabric Amounts are given for the Full Sized Ideal Bag however you can get away with a bit less for the Regular Sized Bag. Leave the Notions the same.
Both bags pictured were sewn with a 'padding' layer for the Laptop. Neither used Interfacing for Stiffener. Yardages are provided for all three.
Outer Fabric (select the width of your material)
Lining Fabric
Padding(Optional) Quilt batting or similar
Interfacing/Stiffener (Optional)
If your Outer Fabric needs a bit more stability, interfacing can add the layer you need (yardage amount will allow for the Flap, Front, Back and Sides to be interfaced.
You can also add stiffener for a heftier bag. But if you're using a canvas, denim or twill (a fabric you'd use for a bottom weight garment or bag), stiffener is unnecessary. Stiffener yardage allows for the Front, Back, and Sides (and no Flap).
Notions
*Make sure to choose the Notions for the Flap you are making*
The notions do not change much in size for either sized Ideal Bag; you can use the below for either sized bag.
Bias Binding
Elastic
Zippers
You can use precut or zipper by the yard. I use the latter for my samples (which is a bit on the wide side compared to store-bought zippers but either work great.
Webbing
Hardware
Use the width of the webbing you are using for your Strap
Printing:
The green Ideal Bag in the photos is a modified version I made in the last two videos. I used elements from the pattern to make my own ideal bag.